

The Mercuna plugin requires Unity 2021.2 or newer, if you’re using an older version you must upgrade your project first.
To install simply unzip the archive and import the Mercuna package into your game project through the Assets/Import Package/Custom Package menu in the Unity Editor. The plugin will now be loaded automatically when you load your game project.
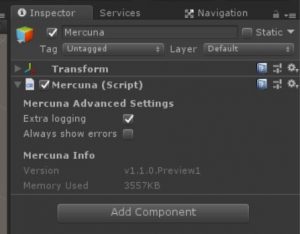
Any scene in which you wish to use Mercuna must contain an instance of a Mercuna singleton object. The singleton is used by Mercuna to internally load and access the Mercuna native libraries.
In addition it contains various advanced Mercuna project settings and information about Mercuna, including memory usage.
The simplest way to get started is to use the Tools/Mercuna/Add Mercuna To Scene menu option. This will automatically add a Mercuna Singleton object, Nav Octree, Nav Volume and Nav Seed to your level.
You should check that the Nav Volume encompasses the entire volume that you wish your 3D agents to navigate within, increasing or reducing the size if necessary.
Also move the Nav Seed so that it is in free space that you want your agents to be able to navigate through.
See below for more details on setting up the Nav Octree, Nav Volumes and Nav Seeds.
The Mercuna Nav Octree is used to find paths for agents through 3D space, much like a 2D Nav Mesh is used to navigate characters moving over terrain.
Nav Octree is generated in the level everywhere that is within a Mercuna Nav Volume. Multiple nav volumes can be present in one level, and if they overlap then agents can navigate seamlessly between them. All space outside of the Nav Volumes is treated as unnavigable.
There can only be a single Nav Octree in a scene. It can be created by adding a Mercuna Nav Octree component to an empty game object.
The octree generation parameters to be used in this level are configured on the Mercuna Nav Octree game object. Upon creation, the parameters are set to default values.
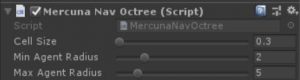
The parameters determine how detailed the representation of the navigable space is in the octree, and the sizes of agents that can accurately navigate through it.
The cell size determines the side length of the cubes that make up the lowest level of the octree. Cells are considered unnavigable if there is any level geometry within them, so the larger the cell size the greater the error margin in the representation of the geometry.
The minimum and maximum agent radius determine what navigation data is stored in the octree. Paths will never go closer to geometry than the minimum agent radius, and the octree doesn’t store data to allow paths to be found with more clearance from geometry than the maximum radius.
The radius is expressed as multiples of cell size, so for a cell size of 0.3, a minimum radius of 2 and a maximum radius of 5, entities of radius between 0.6 and 1.5 can be accurately navigated through the level. Agents that are smaller than the minimum radius will navigate successfully, but might not take paths through small gaps they could fit through. Agents that are larger than the maximum radius can’t be navigated properly – paths might make them collide with geometry.
To set up a nav volume, add a Mercuna Nav Volume component to an empty game object, and position and scale it to the correct size. Only axis aligned volumes are supported, so you must not rotate the volume.
In order to identify which regions should be considered navigable Mercuna requires you to place objects with the Mercuna Nav Seed component into your scenes. This allows uninteresting regions, such as the small isolated areas inside hollow geometry or large areas outside of the level boundaries, to be excluded and avoids agent positions getting clamped to the wrong side of polygons.
A Mercuna Nav Seed needs to be placed in the main part of the level where agents will move. This seed is used during construction of the octree to find all connected reachable cells, by flood filling the region starting at the nav seed. If you have multiple disconnected areas in your level where you expect agents to move, a seed must be placed in each separate area.
The octree must be built after it is first configured or after the level geometry has changed. Do this by selecting Build octree from the Tools/Mercuna menu. An on screen notification displays the progress of the octree construction.
If full Mercuna logging is enabled (see below), then you will see the generation progress for each navigation volume in the output log, and the total memory consumption of the octree is reported.
The main influences on memory usage and performance are:
Finding paths through the nav octree can be done implicitly by making your agent movement controlled by Mercuna, this method allows you to take advantage of the Mercuna steering and avoidance systems. Alternatively, path finding can be requested explicitly by making a request directly to the octree (via the MercunaNavOctree C# script) and receiving a MercunaPath (or MercunaSpline) object which can then be used as required.
As pathfinding is performed asynchronously, the returned MercunaPath (or MercunaSpline) object is not immediately valid, but can take one or two frames to complete. You must either check each frame to see if it is ready yet or subscribe to its PathUpdated (SplineUpdated) delegate.
For longer paths Mercuna uses hierarchical pathfinding. An approximate path is found through a simplified representation of the level and then a detailed path find is performed guided by the approximate path. This allows much longer paths to be found than would be possible with simple A* pathfinding alone.
Mercuna also supports partial paths (enabled by default). A partial path is returned when a complete path can’t be found to the specified destination, if it is disconnected from the start point, for example. Instead Mercuna returns a path to the closest point to the destination that is reachable.
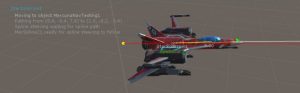
In order to easily debug and understand pathfinding problems a Mercuna Nav Testing object can be used to generate test paths. Simply add a Mercuna Nav Testing component to an object, and set any other object in the scene as the End. When you do this a test path will be drawn connecting the two objects. This path will update when either object is moved. A red path means a complete path could be found, while an orange path means that only a partial path could be generated.
The Radius property specifies how much clearance there should be around the test path – this allows you to check what path larger and smaller agents would take.
In order to allow agents to use Mercuna to navigate they need to have the following components:
How an agent moves depends on how its flight style is configured. The flight style options are set on the Mercuna Navigation component. The options include:
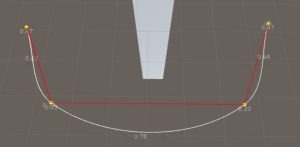
In order to give smooth, natural looking movement Mercuna uses polynomial splines to interpolate between path points to generate smooth curves. These splines are constructed taking into account available space and define a continuous velocity curve that can be followed precisely. Mercuna navigates the agent down the spline path taking into account the maximum speed and acceleration configured on the pawn.
Whereas the pathfind is performed when an agent is given a destination, the spline is generated on demand. If the agent is pushed, or has to avoid other objects causing it to move away from the spline, then the spline and the underlying path are automatically regenerated.
Spline based steering can be disabled to fall back to previous simple steering by turning off Smooth Paths in the flight style options. However, the simple steering method suffers from the problem that agents frequently overshoot corners and fall off the path, resulting in collisions with level geometry and it is not recommended to be used unless necessary for backwards compatibility.
Mercuna offers dynamic obstacle avoidance to ensure that agents don’t collide while moving. Any game object with a Mercuna Obstacle Component is automatically considered as an obstacle that needs to be steered around for the purpose of avoidance. The avoidance algorithm used by Mercuna is a modified version of ORCA velocity obstacle method that additionally takes into account the fixed level geometry stored in the nav octree.
In order for the Mercuna navigation component to drive the moment of an agent, the agent needs to have a suitable movement controller. A simple movement controller is provided – the Mercuna Move Controller. This is suitable for a variety of 3D flight styles.
Custom movement can easily be implemented by customising the controller. By default the Mercuna Move Controller provides a Newtonian flight model for a pawn moving freely in space. It allows you to configure:
The following functions are available on the Mercuna Navigation component and can be used to direct an agent to move between goals:
All the functions (except Cancel) take an optional MoveCompleteDelegate delegate that is triggered whenever a movement action is complete. The delegate receives a boolean that indicates whether the move command was completed successfully or whether it failed.
The Mercuna Nav Octree actor offers the following query C# functions:
As well as the following pathfinding functions:
Mercuna comes with a set of example scripts that demonstrate the different ways that Mercuna can be used. These can either be used directly or can be used as the basis of your own movement behaviors.
If you find that your agent is not moving as expected, or at all, there are several debugging mechanisms available within Mercuna to help quickly identify problems.
By default Mercuna makes logs to the Unity logging system to indicate warnings and error conditions. If more information is needed then the advanced Enable Extra Logging option on the Mercuna singleton, can be enabled. This is option persists between editor restarts. Extra Logging causes Mercuna to output all log messages, including additional debug messages, to a dedicated Mercuna.log file, located in the same directory as the standard Unity logs.
When trying to understand the actions of a particular agent, it can be useful to set it as the Mercuna debug object. This can be done by selecting the agent and setting is as the Mercuna debug agent in the Mercuna toolbar menu. Only objects with a Mercuna Navigation component can be set as the debug object.
On screen log messages will be displayed for the Mercuna debug object and additional debug draw is available.
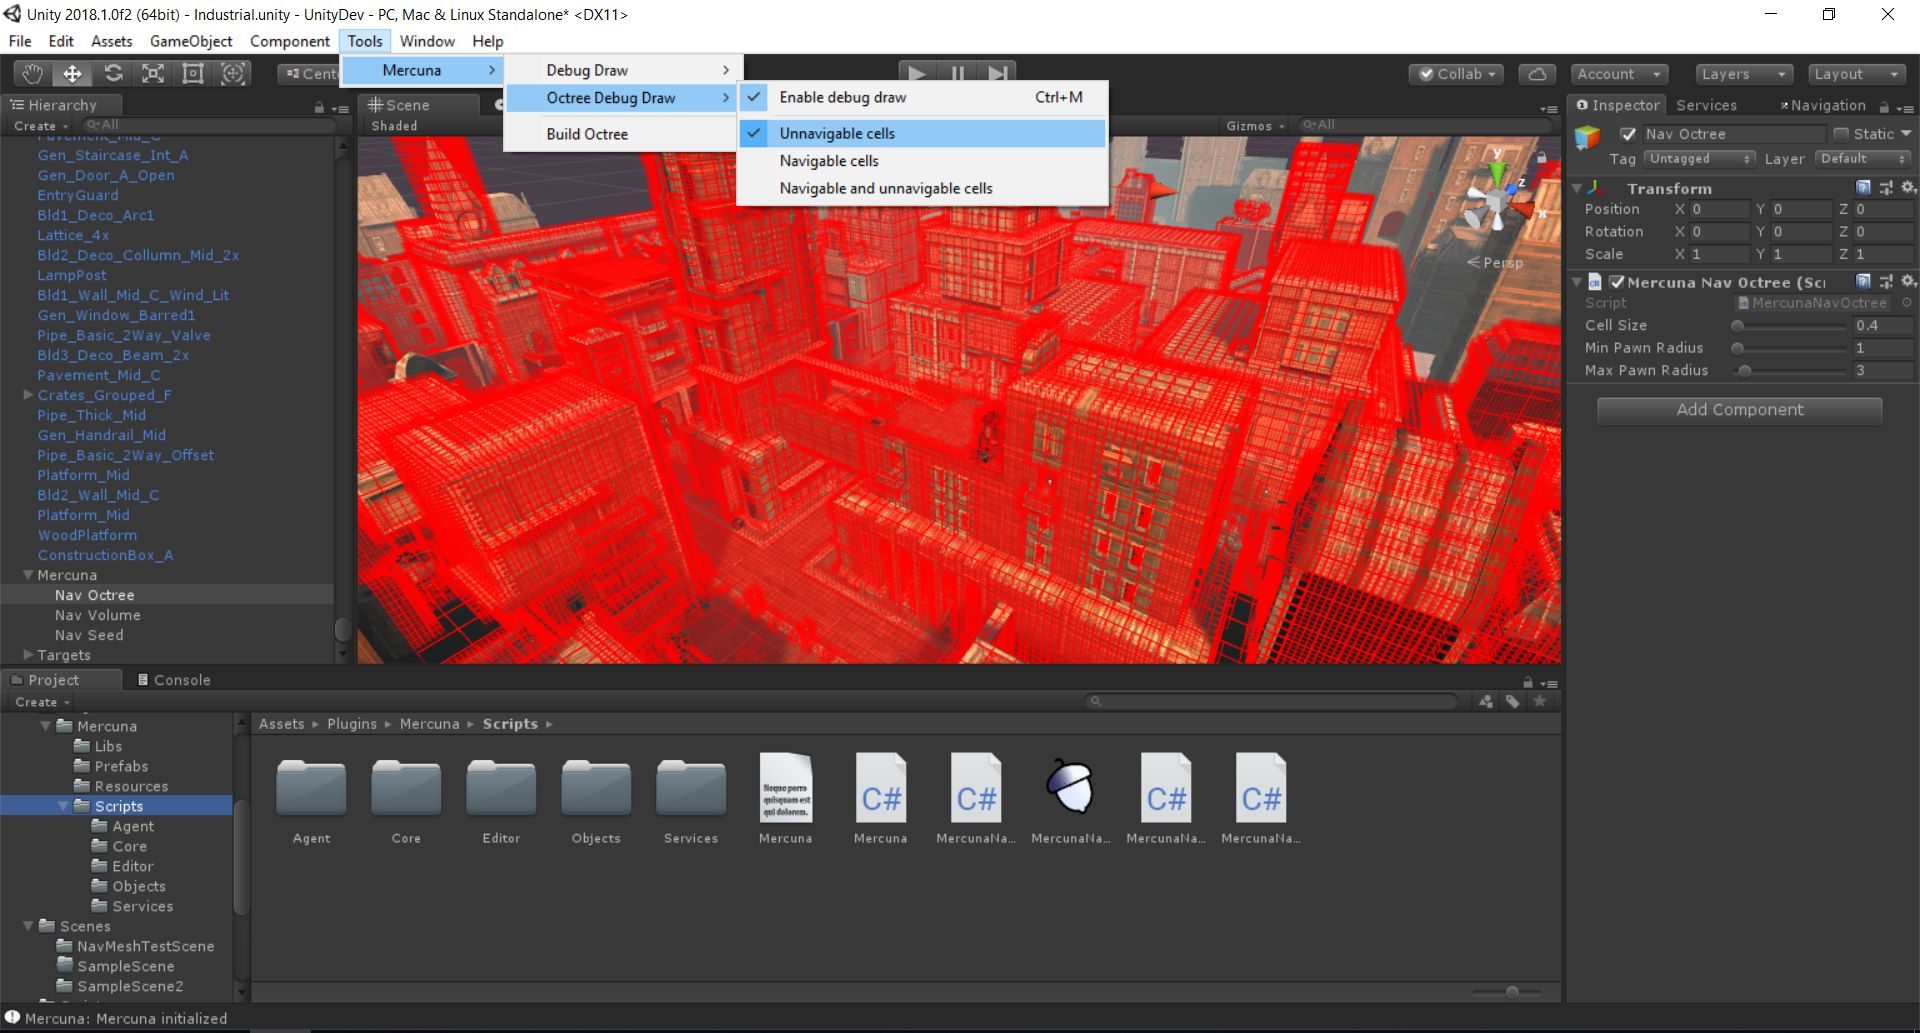
In order to help understand the current movement of Mercuna controlled agents, Mercuna offers various debug draw options, both for the agents and for visualising the octree.
For agents the following debug is available:
If the debug object is set then just for that agent there is extra debug draw:
The octree can be visualised in different ways:
If the Mercuna debug object is set, then the navigation radius of that actor is used to determine which cells are treated as unnavigable.
There are also options to draw particular cells in the octree: