In this post, I am going into a bit more technical detail about how you can create your own custom EQS tests.
One of Unreal Engine’s slightly hidden AI features is its Environmental Query System (EQS). The system is still considered experimental so is not enabled by default, but can easily be switched on in the Experimental section of the Editor Preferences. The EQS is a very powerful system for running customisable queries to generate and evaluate positions at runtime.

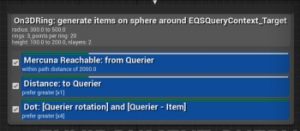
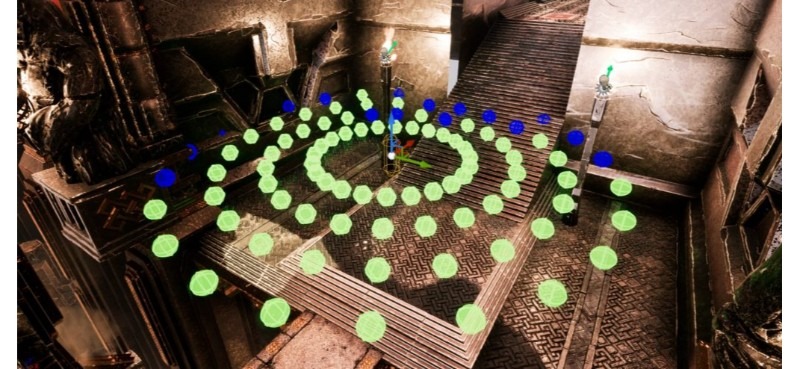
An EQS query is composed of a generator to create a set of candidate items (normally locations) and a series of tests to filter and score each item. As with most of the Unreal Engine, it is very simple to add your own custom generators and tests. What I am going to look at here is not a complete tutorial on how to create new tests, but instead a look at some of the more interesting points that should be considered when creating your own tests in C++.
What is an EQS Test?
An EQS test receives a series of items, either passed in from a generator or the result of a previous test, and independently filters and/or scores each one. When filtering, a test simply returns whether each item passes or fails, while when scoring it assigns a numerical score to each item. An item is most commonly a location, but can also be a rotation or actor. Each test specifies what type of items it supports in its constructor by setting the ValidItemType member.
Unreal performs tests in an order based on their declared cost. When you define your test, in the constructor, you set whether it has low, medium or high cost. Then for a query that contain multiple tests the higher costs test are performed later, after the low cost ones. The idea is that the earlier, quicker tests will do initial filtering and remove many of the items, so that more expensive tests have fewer items to test.
Creating a new test
Creating a new test involves simply deriving a new class from UEnvQueryTest and implementing a constructor and three functions:
virtual void RunTest(FEnvQueryInstance& QueryInstance) const override;virtual FText GetDescriptionTitle() const override;virtual FText GetDescriptionDetails() const override;
The most interesting of these and where all the work happens is the RunTest function, this is where you implement the code to test each candidate item.
The naming convention used by Unreal is to name tests with the prefix UEnvQueryTest_*. The prefix is automatically removed and the remainder of the class name used to label the test in the editor. New tests are automatically registered with the engine and will appear in the test list. In the class specifiers you can set a category but a bug in the engine means the tests don’t actually appear under the category in the list and therefore it is advisable to include the category name as the first part of your test names.
Tests do not store any data themselves as the same instance of a test can be used for multiple queries, instead all the information including the items to test, the parameters of the test and the test context are passed into the RunTest function via an FEnvQueryInstance argument.
Putting it in context
The test context is the object with respect to which the items are tested. What does that mean? I think examples are the clearest way to explain:
- For a raycast EQS test the context would be the source that rays are sent from and the items the target destinations. Only those items will a clear line of sight from the context would pass.
- For a distance test it would only be items within the specified distance of the context that would pass.
- For a reachable test only the items that have a path from the context would pass.
Similar to items, contexts can also be either locations or actors. By default the context is the AI actor that is running the test.
Usually a test will receive just a single context to test from, however depending on how exactly the query is set up, tests can also receive multiple context objects at once. Each item should then be tested against each context object and scored independently. The framework itself then decides whether the item passes overall or not. The test can be configured to require that items pass only if all contexts pass (All Pass) or if at least it passes one context (Any Pass).
ItemIterator
The real magic of the EQS test is the ItemIterator. As its name might suggest this is how you iterate over the candidate items to test them and how you set the result for each one. A simple example of using the iterator is shown below:
for (FEnvQueryInstance::ItemIterator It(this, QueryInstance); It; ++It)
{
	const FVector ItemLocation = GetItemLocation(QueryInstance, It.GetIndex());
	It.SetScore(TestPurpose, FilterType, IsNavigable(ItemLocation, Radius), true);
}
The clever bit is that under the covers it is the ItemIterator which enforces the EQS time slicing. If the EQS time budget has been exhausted for the frame then the iterator will terminate early. The next frame the same test will be run again, but only untested items will be returned by the iterator. Similarly, if the EQS system only requires a single positive result, as is often the case for the final test in a query, then the iterator terminates as soon as the first item passes. Due to this cleverness the ItemIterator can only be used once in each test.
If for some reason you want to test all the items in a batch before setting of the result, possibly for efficiency, then since you can’t use the ItemIterator to get the items, you have to directly access the QueryInstance.Items array instead:
for (int32 ItemIdx = 0; ItemIdx < QueryInstance.Items.Num(); ItemIdx++)
{
	if (QueryInstance.Items[ItemIdx].IsValid())
	{
		Points.Add(GetItemLocation(QueryInstance, ItemIdx));
	}
}
The ItemIterator is then just used to set the results. However, in order to prevent it from terminating early due to having exceeded the EQS time budget for the frame, you need to call It.IgnoreTimeLimit() before starting to set any of the results. This avoids throwing all work away done during the batch testing and allows you to set all the item results.
Pass or Fail
Writing new EQS tests is quite straightforward. However, without being aware of the subtleties of the system it is very easy to structure your tests incorrectly. We certainly did the first time we created a new test for Mercuna. I hope this post allows you to avoid some of those mistakes and help your AI find suitable positions.


